If you’re like me, “steam” is just one of those subjects you have never thought of trying to capture before. So, when someone asked me how to photograph it, I figured I had better learn how to do it! This video is a rundown of the 7 valuable discoveries I made on my first experiment with photographing steam, using front, back, side and top lighting in the controlled environment of a lightbox.
Summary
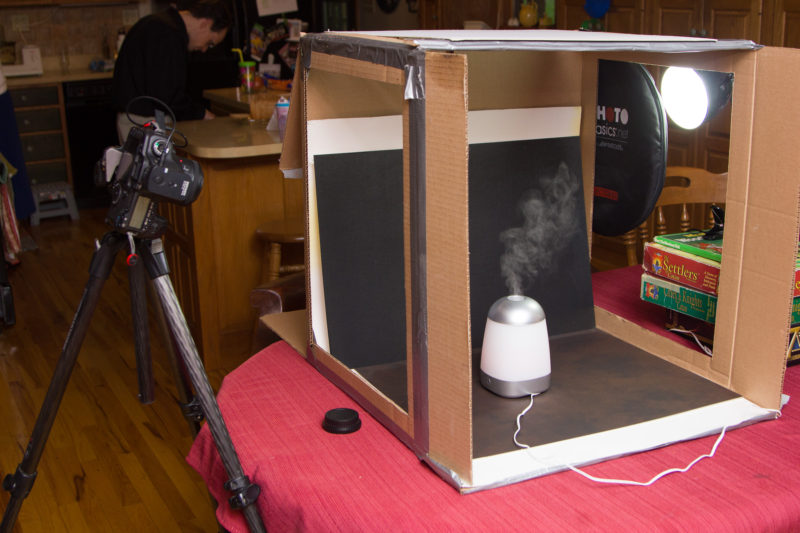
Steam! What an interesting subject to photograph! Having never tried photographing it before, I pulled out my light box and camera to do some experiments when a PRO member asked me how to do it. I tried four different angles of light to see which one captured it best.
The first angle that I tried was side lighting. By pointing my camera at the subject and allowing light to come in from the side of my light box, I was able to capture some steam, but I was not quite satisfied. The background wasn’t dark enough, the steam wasn’t bright enough, and there were lots of problems with glare and overexposure in the foreground.

The second angle I tried was back lighting. This angle really worked! With the light shining through the steam from behind, it allowed for the greatest amount of contrast between the steam and the background. Also, since I was shooting into the light and exposing for the bright steam, it allowed me to drop my ISO considerably, thus enhancing the overall image quality of the shot.
The third angle I attempted was front lighting. This angle did not work very well. Since the light was falling on the background as much as it was the steam itself, there was very little contrast between the steam and background regardless of how much I under or overexposed the shot. I attempted to partially block the light in different ways, but there simply wasn’t a good way to make this angle of light work.
The fourth angle was top lighting. With this angle of light, the background fell into darkness again, but the reality was that it was no different than side lighting, involving the same sort of problems.

After experimenting with these different angles of light, I concluded that back lighting was the best and recommend this light position over the other three. It gave me the nicest photo with a best image quality in the final shot.
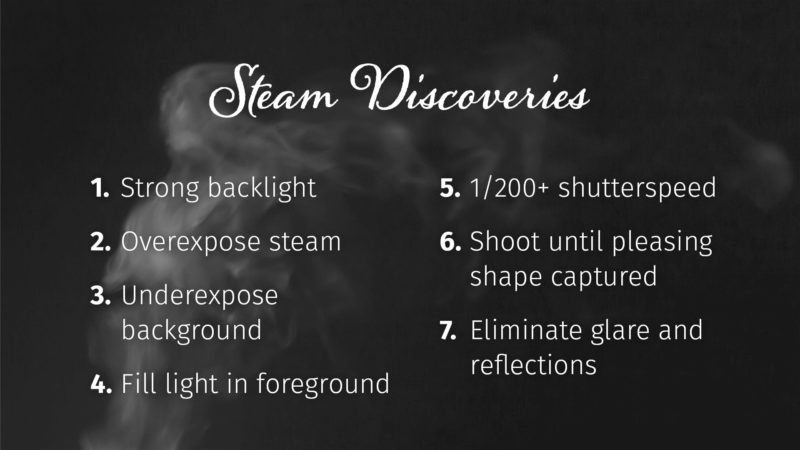
So in summary, here are the 7 best practices that I have discovered so far for photographing steam.
1. Set up a strong back light
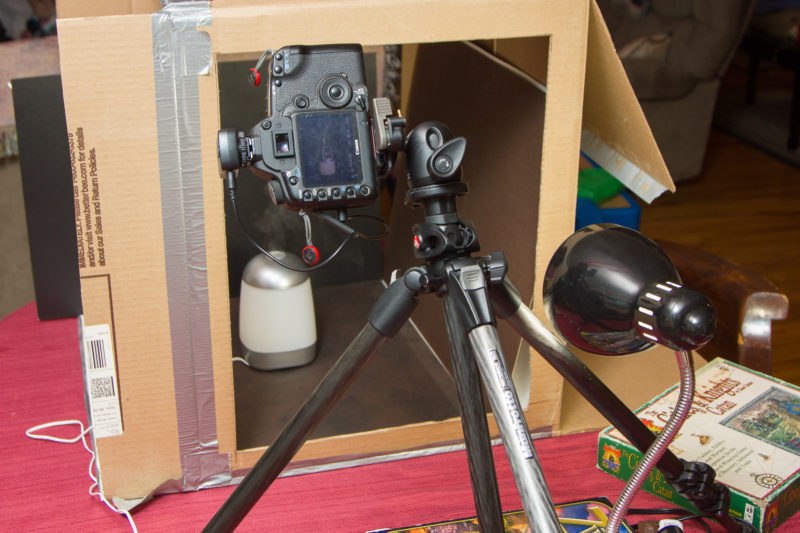
Set up your subject so it’s positioned against a dark background. Add a strong light source pointing into the camera through the steam, though not visible in the frame. In my situation, I set up the light just directly above the frame. The same effect can be gotten if the light source is positioned behind subjects in the frame. (I really do suggest using a brighter light source than I did here.)

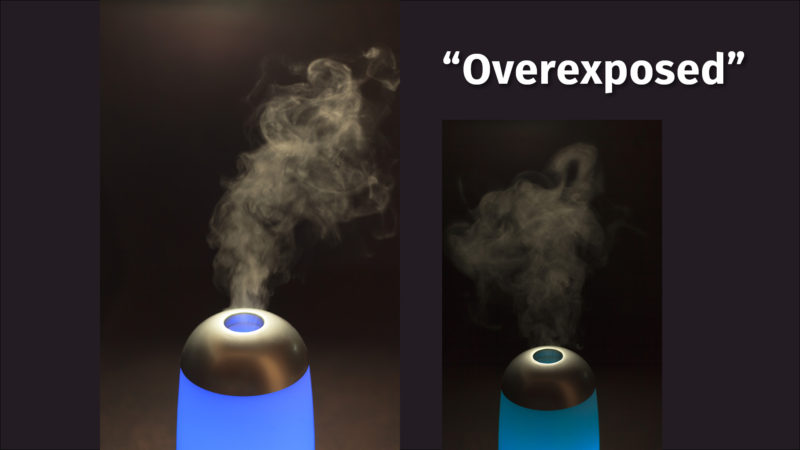
2. Overexpose the steam
With the strong back light lighting up the steam, your camera’s meter will read the scene as very bright and recommend an exposure that will make the picture too dark. Manually override the camera’s recommended exposure to overexpose the steam as much as you can without blowing out highlights. The more you overexpose the steam, the more of it you’ll see.
3. Let the background fall into underexposure
Even with the steam overexposed, the back light shining through the steam should bright enough that the background will still feel underexposed. The brighter the back light, the more underexposed the background will be, and thus, the more contrast there will be between the steam and the background.

4. Incorporate fill light as needed
You are now free to incorporate other lights to fill in and bring into proper exposure other elements in the scene, both in the foreground or background.
5. Use fast shutter Speeds
Slow shutter speeds do not help steam. I recommend using 1/200 of a second to capture the greatest amount of texture in the steam.

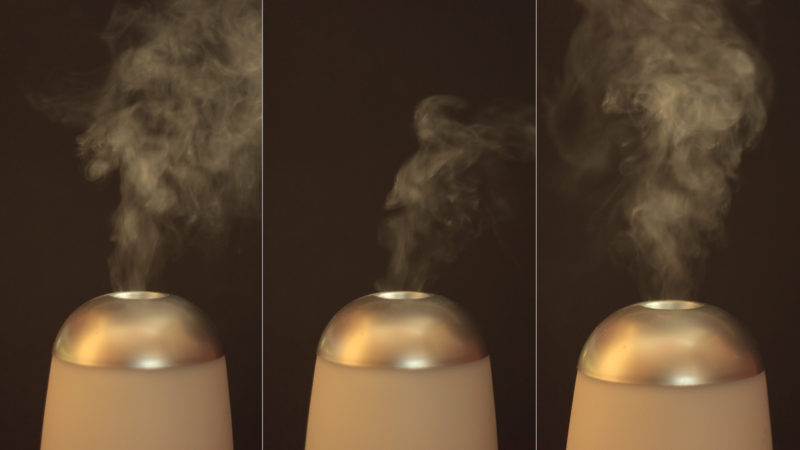
6. Shoot till you’ve captured a pleasing shape
Like a snowflake, every picture that you take of steam will be different. Just keep shooting till you find the shape that suits your fancy best. See what happens when you blow on it too. 🙂
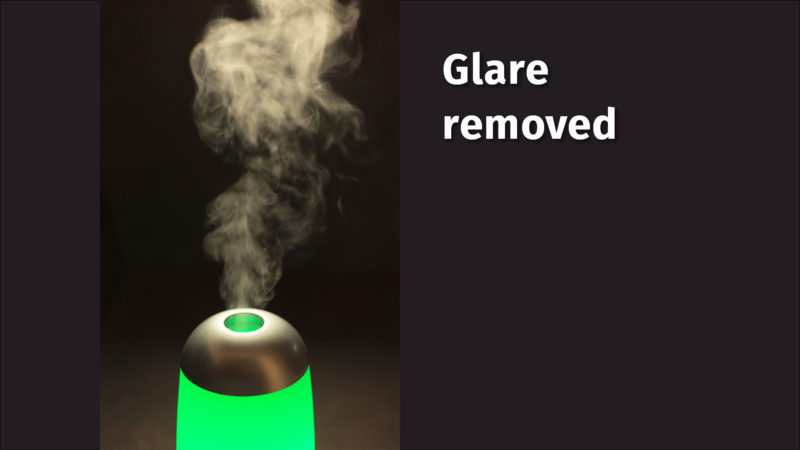
7. Eliminate glare and reflections
Generally speaking, the darker the background the better! Removing glare and reflections will help with this. Watch for light coming from other sources too. Make sure the only light hitting the steam is from behind, from the main source.
Bonus tip!
If you’re shooting real steam (instead of water vapor like from the diffuser I was using), keep in that the hotter the liquid and the colder the air, the more steam you will have!
Assignment
When was the last time you challenged yourself to photograph an atypical or difficult subject? These are only 7 best practices that I took note of as I was photographing steam for the first time. What other best practices would you add to the list?
- Can you come up with more than 7 “best practices”?
- Can you capture steam just as effectively outside the controlled environment of a lighbox as well as you can inside it?
- Can you make it work with a more natural subject than an essential oils diffuser? like a cup of coffee or tea?
Leave a comment below to share what you learn during your experiments!
