Recently, a photographer friend of mine encouraged me to consider spending a little more time doing “local brushing” on my photos to help accent highlights, deepen shadows and increase overall visual appeal.
I’m still learning how to do it (often I don’t really know where to start….what should I highlight? what should I darken?), but as you can see in the video and pictures below, it really does make a big difference!
Behind the Scenes Insights
- Local brushing is something anyone can do. Just about every photo editing program will have a lightening/darkening brush tool of some sort. In this video I’m just using Lightroom because it’s what I have.
- You’ll notice at the beginning I began with a 3-photo HDR merge. This allowed me to start my editing with plenty of information in both dark and light areas, which is generally a problem when shooting directly into the sun.
- The auto settings straight from the HDR merge didn’t provide enough contrast around the sun so I started there with the radial filter and setting the white point (the sun is always pure white).
- I struggled with the sky and vignette. I thought at first it would look nice to have the sky a little darker in the top left corner and to add an overall vignette, but after making these changes, I decided against them…there was already too much dark in the image.
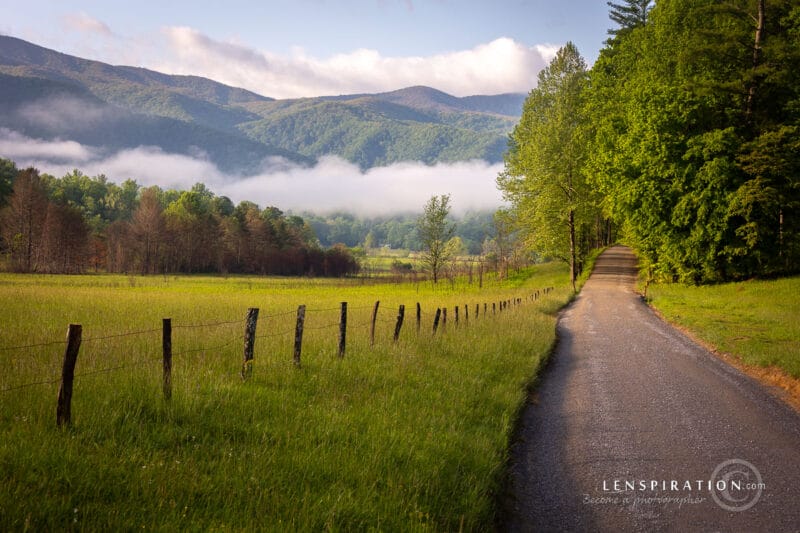
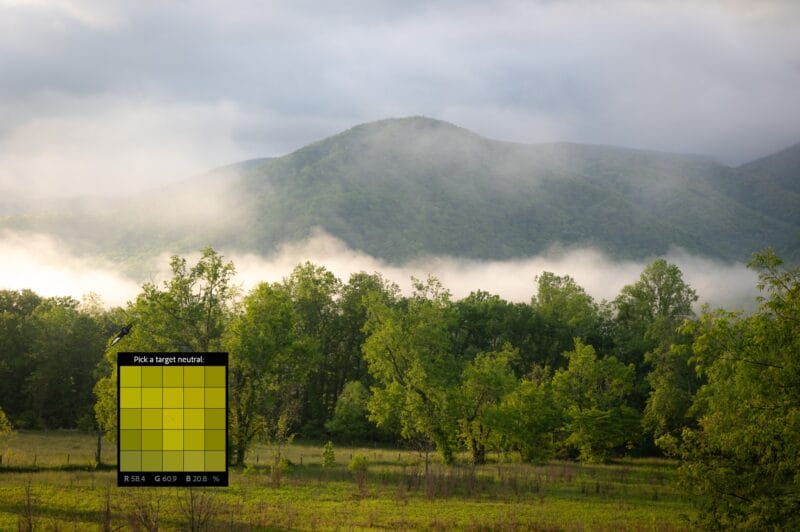
- As you can see below, the first image without brushing is nice, but doesn’t look nearly as nice as the second image that has the local brushing.
Anyone have any tips for me as I dabble more with local adjustment tools? How would you have edited this photo differently? What would you have done to make it more appealing?
Maybe I’ll ask our guest photographer Donnie Rosie on the next photo critique webinar…

Without brushing (above). With brushing (below).


Would that be the same as the dodge and burn tools in Photoshop? I’ve just started experimenting with them. I don’t understand everything about them thought. So far, one thing that I don’t like is if I mess up it’s harder to undo.
The dodge and burn tools in Photoshop only affect exposure. With the brush tool in Lightroom you have the option of not only adjusting exposure but also white balance, contrast, clarity, etc. One thing I normally do in Photoshop if I’m making adjustments directly on the photo is to make a duplicate layer of it overtop of the original and make my adjustments on the duplicate layer. That way if something doesn’t work out or if I overdo it with something I can “undo” it by simply masking out that particular area of the duplicate layer and allowing the original layer underneath to be revealed. By varying the opacity of the brush on the mask, I can either eliminate the effect altogether in that area or I can simply make it more subtle.
Yeah, very similar. For non-destructive dodging and burning in Photoshop, here’s a technique that I like to use that works really well: https://www.shutterevolve.com/using-the-dodge-burn-tool-non-destructively-in-photoshop/
Thanks! It looks like something I can definitely keep work on learning.