Jonathan, with VizaFrame, is hands-down the best real estate photographer in town! If you haven’t seen his work, you gotta check him out at Vizaframe.com. Or why not follow him here on his Facebook?
Well, it turns out that this famous guy needed some professional business portrait photos taken. And believe it or not, he asked me to take them! You know how nerve wracking it is when a local celebrity wants you to do photos for them?!
Of course, Jonathan is my brother, so I really wasn’t that nervous. But still, there was that pressure to make sure I got some good photos for him. ![]()
So, we set up a time and chose a location to meet. At the top of the hill behind Mom and Dad’s house. There’s a pretty little overlook up there, and it faces due west. A perfect spot for golden hour!
And praise the Lord it was a golden hour indeed! No rain, no clouds. Just pure, epic, warm light!
Though it wasn’t long, it was a good shoot. We did several different poses. Some with his camera, some with his drone. Some by himself, some more candid in nature.
As always, I’m always learning new things. And I walked away with at lest 4 takeaways from the shoot.
1. Dust kicked up from passing cars on a gravel road makes really great atmosphere!
Take a look at the difference between the following two photos! The second shot was after a car drove by down the dusty, gravel road. It caught the direct light and turned the background into glowy warm instead of overexposed-tree green. It also made the camera, our clothes, and our camera bags kinda dusty. But that’s ok. We can wipe dust off these kind of things. ![]()


2. Have the client choose the photos they like on-location after the photo shoot
This may not be a good idea for any client. Depends on how particular they are, or how negative they are about how they appear in photos. But for Jonathan, he knew what kind of expression he liked. So after the photo shoot, I handed him my camera, and he used the fancy rating feature on it to 1-star all the photos he liked. That made my job much easier later when it came time to edit. I could start off with sorting all the photos by 1-star rating, and just like that, an entire first round of culling was done, and I could be confident that the expressions in the ones I was editing were ones he liked.

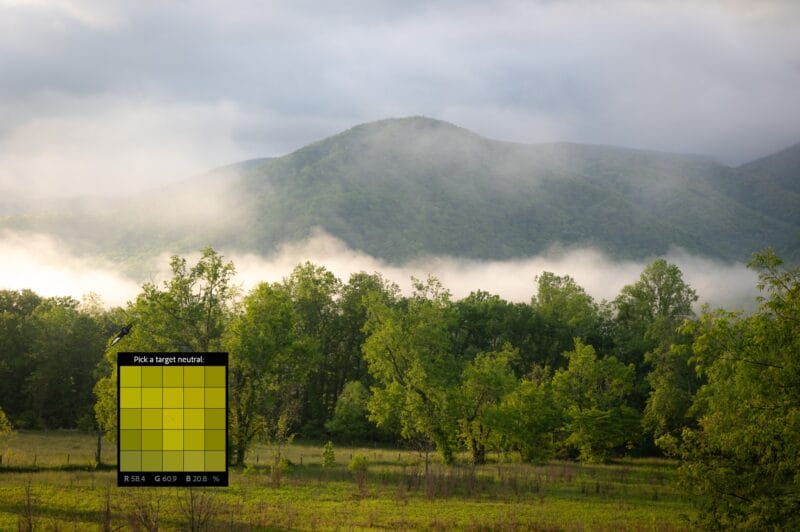
3. I finally found a practical use for the Contrast slider in Lightroom!
If you’ve taken my course on photo editing, you’ll know why I never really touch the Contrast slider in Lightroom. But when editing these photos, I finally found a good way to use it! Take a look at the difference between the two following shots:


We’re suffering from lack of contrast due to lens flare here. I tried all my normal tricks for making it look good (left photo). Didn’t work. Then I started playing around with the Contrast slider. Much better! Whatever algorithms the sliders use to do what they do, the Contrast algorithm is what this photo needed. While the Contrast slider doesn’t work for most scenes, I found out that it can work pretty well in photos with problematic lens flare.
4. I probably should have matched location with profession
If I were to do this photo shoot again, I’d go to a different location. Not because the location was bad. It just doesn’t really match the profession of the subject very well. If he specializes in real estate, then more urban surroundings would have been a better choice. Thankfully, he said it didn’t really matter. But next time, I’d probably suggest a different location.

And those are the 4 takeaways from my professional business portrait shoot with Jonathan of VizaFrame!
Have you done any photo shoots recently for a famous person (like a sibling or family member)? What pointers did you take away from that shoot? Feel free to share with us what you are learning in the comments below!


0 Comments